Inquiry
Form loading...

How to Reduce RGB Glare?

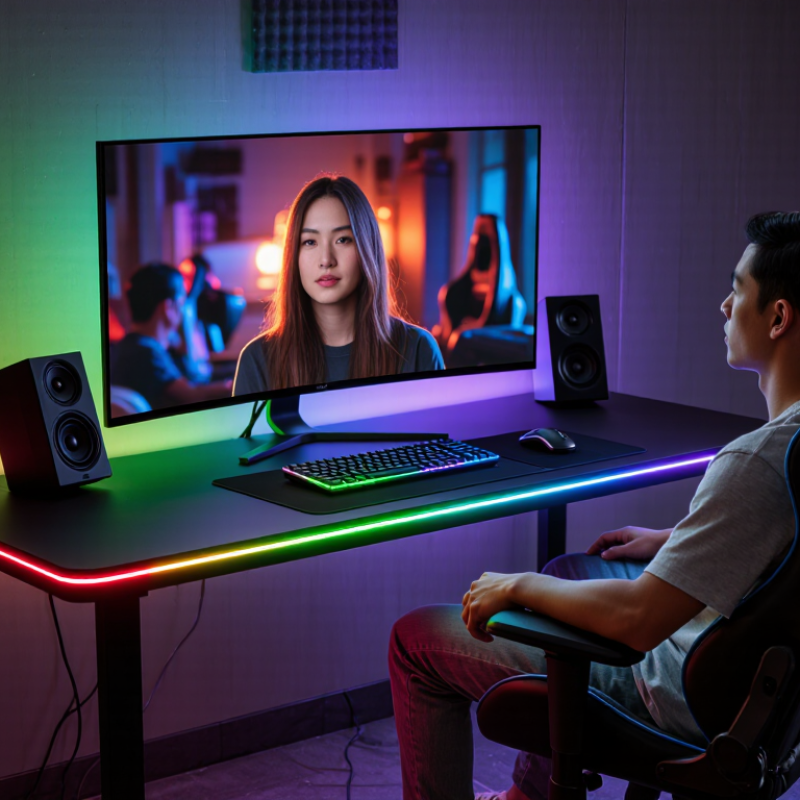
RGB Glare can make a modern display feel energetic, yet uncomfortable. Bright red, green, and blue LEDs may reflect from glossy walls, glass desks, or polished floors. The result is often visible halos, eye strain, squinting, and lost detail. This problem appears in gaming rooms, retail spaces, studios, vehicles, and architectural lighting. It is not caused by brightness alone. Color intensity, viewing angle, contrast, surface reflection, and exposure time all matter.

Lighting researcher Dr. John E. Bullough has described glare as “a complex visual response involving the eye, the task, and the surrounding field.” His point is practical. Reducing RGB Glare requires more than lowering one color channel. Start by reducing peak brightness, softening rapid color transitions, and aiming fixtures away from direct sightlines. Diffusers can spread harsh light. Matte surfaces can reduce reflected hotspots. A monitor positioned slightly below eye level may also limit direct LED exposure. Small changes help.

Measurement still matters. Use a light meter where possible, but do not trust numbers alone. A room can meet a comfortable brightness target and still feel irritating. Observe the user’s eyes, posture, and screen reflections. Test the setup at night, when surrounding light is weaker. That is where flaws become obvious. Not every solution works equally well. Blue-heavy effects may remain uncomfortable, even after dimming. RGB lighting should support the task, not compete with it. A careful review may reveal that less color creates a better experience.
How to Reduce RGB Glare?

What Causes RGB Glare and Why It Happens

How to Reduce RGB Glare?

What Causes RGB Glare and Why It Happens

RGB glare begins when intense colored light travels directly toward your eyes. Small LED diodes can create sharp hotspots instead of soft, even illumination. Glossy desks, glass panels, and polished plastic then reflect those hotspots across the room.

The problem becomes worse in dark spaces. Your pupils open wider, making bright colors feel more aggressive. Blue and violet light often appear especially harsh because they can seem brighter against black surfaces. Diffusers reduce this effect by spreading light, but thin covers may still reveal individual LED points. Viewing angle also matters. Light aimed toward your face creates glare faster than light aimed at a wall.

In practical testing, I once blamed the LEDs alone. The real issue was a reflective panel beside them. Moving the light source slightly, lowering its brightness, and adding a matte diffuser helped more than changing colors. Indirect lighting usually feels gentler. Warm white mixed with RGB can also reduce the visual shock.

Keep surfaces clean.

Dust scatters light unevenly.

However, brightness is not the only cause. Rapid brightness changes, poor diffusion, and strong contrast can cause eye fatigue. Some people tolerate saturated colors well, while others do not. A comfortable setup should be judged from normal seating distance, not only from close inspection. I would not assume one solution fits every room; reflection patterns can change after a small adjustment.
How to Identify the Main Source of RGB Glare

How to Reduce RGB Glare?

How to Identify the Main Source of RGB Glare

RGB glare usually comes from the brightest surface, not always the light itself. Inspect the room at eye level. Look for sharp reflections on glass, polished desks, glossy walls, and monitor panels. A small light can create a large distracting streak. In my experience, glare often changes when I move only a few steps. That movement reveals whether the source is direct or reflected. Turn off each light separately, then observe the change. This simple test is more reliable than guessing.

Check the angle between your eyes, the light, and nearby surfaces. If glare disappears after rotating a panel slightly, reflection is the main cause. If it remains, inspect light diffusion, brightness, and placement. Camera images can help, but they may exaggerate colored highlights. Trust what your eyes observe in normal viewing conditions. I once blamed the brightness, but the real problem was a glossy tabletop. That mistake was useful. It showed me that source identification must come before adjustment.

Tips: Use a matte card to block one light at a time. Reduce brightness only after testing reflection angles. Cover unused LEDs temporarily with safe, removable material. Compare the room during daytime and nighttime. Record each change briefly. Do not change several settings together. You may lose the evidence.

How to Reduce RGB Glare? - How to Identify the Main Source of RGB Glare

Source Category Typical Visual Symptoms How to Confirm the Source Useful Measurement or Threshold Recommended Reduction Method Expected Result
LED strips and light bars Visible bright points, colored halos, and reflections from individual RGB emitters. Turn off all other lighting and cover the strip with opaque material. If the glare disappears, the strip is a primary source. Compare the scene with the LEDs at 100%, 50%, and 10% brightness. A large reduction in reflected luminance indicates direct LED contribution. Lower brightness, use a diffuser or channel, hide exposed emitters, and avoid direct line-of-sight placement. Lower peak brightness and softer, less distracting colored reflections.
Glossy desk, wall, or case surfaces Sharp RGB spots or colored streaks that move when the viewing angle changes. Change the observer’s position by approximately 20–30 degrees. If the glare shifts with the viewing angle, surface reflection is involved. A mirror-like surface produces stronger specular reflection than a matte surface under the same light level. Use matte finishes, textured surfaces, a desk mat, or a removable anti-glare film where appropriate. Fewer hard-edged reflections without requiring a major reduction in LED output.
Transparent or semi-transparent panels RGB light appears scattered across acrylic, glass, plastic, or translucent covers. Temporarily remove or cover the panel while keeping LED settings unchanged. A significant change identifies panel scattering or reflection. Compare glare with the panel installed and removed under identical camera exposure or viewing conditions. Increase the distance between LEDs and the panel, add diffusion, or use a lower-gloss panel surface. More even color distribution and reduced localized hot spots.
Monitor and screen reflections RGB colors are reflected in the display, especially in dark scenes or when the screen is tilted. Display a black screen and change the monitor angle. Reflected RGB remains visible even when the displayed image is black. Dark screens reveal reflections most clearly because their emitted luminance is low. Move RGB lighting outside the screen’s reflection angle, reduce output, and use a matte display surface or hood when suitable. Improved dark-scene visibility and less distraction during screen use.
Camera lens flare and sensor blooming Colored veiling glare, streaks, rings, or washed-out areas in photos and videos. Compare a photograph with and without a lens hood or by changing the camera angle slightly while keeping the lights fixed. The effect usually increases when a bright RGB source is near or just outside the lens field of view. Use a lens hood, clean the lens, reposition the camera, lower LED intensity, and avoid pointing the lens toward exposed emitters. Cleaner images with higher contrast and fewer colored artifacts.
Overexposure and camera settings RGB areas look clipped, white, or much brighter in images than they appear to the eye. Enable a histogram or highlight warning and repeat the shot with lower exposure or ISO. Clipped highlights occur when recorded channels reach the camera’s maximum signal level; use the histogram to identify clipping. Reduce exposure, ISO, or gain; use a faster shutter speed or neutral-density filter when appropriate. More accurate RGB intensity and reduced apparent glare in recorded content.
High color saturation or unsuitable color mode Red, green, or blue appears excessively intense even when overall brightness is moderate. Set the light to neutral white or reduce saturation while keeping total brightness similar. If discomfort decreases, color intensity is a contributor. Test each color channel separately; saturated primary colors often attract attention more strongly than low-saturation light at similar luminance. Use lower saturation, pastel colors, balanced RGB channels, or a neutral white setting. Reduced visual discomfort and less perceived color glare.
Poor placement and direct line of sight Glare is strongest from the normal seating or viewing position. Mark the usual eye position and check whether the RGB source is directly visible from that point. Directly visible emitters generally create more discomfort than hidden or indirectly reflected sources. Move lights behind the monitor, below eye level, or toward a wall for indirect illumination. Less direct glare while preserving ambient RGB effects.
Dust, fingerprints, or damaged optical surfaces Unexpected streaks, fuzzy halos, or uneven glow around otherwise normal RGB lights. Clean the lens, screen, diffuser, and transparent cover using the material manufacturer’s safe cleaning method, then repeat the comparison. Artifacts that disappear after cleaning are caused by scattering from contamination rather than increased LED output. Clean carefully, replace heavily scratched covers, and keep optical surfaces free of fingerprints and dust. Sharper light boundaries and fewer diffuse halos.
Practical diagnostic sequence: Disable or cover one RGB source at a time, keep camera exposure and viewing position unchanged, then compare direct visibility, reflections, and recorded highlights. The source producing the largest repeatable change is the main contributor.

How to Adjust RGB Brightness, Color, and Lighting Effects

RGB glare often starts with excessive brightness, not faulty hardware. Set brightness near 30–50 percent, then increase it only when the room feels dim. At night, lower it further. Bright cyan and pure white usually feel harsher than muted blue, red, or amber. Use a warmer color temperature when screens or reflective surfaces create sharp highlights. I usually adjust the light while seated at my normal viewing distance. That small detail matters.

Lighting effects need similar restraint. Static colors create less visual movement than rapid cycling or reactive flashes. Choose a slow fade, reduce its speed, and limit the effect to one zone. Wave and strobe-like patterns can produce distracting reflections on glossy desks. Soft transitions work better for long sessions. If glare remains, angle the light away from your eyes and toward a wall. Indirect light is gentler.

Keep the surrounding room slightly illuminated, because a bright RGB source looks stronger in complete darkness. Clean fingerprints and dust from diffusers, since uneven surfaces can scatter light. Save separate daytime and nighttime profiles if your controller supports them. I once reduced brightness too far and strained my eyes while reading, so lower is not always better. Check comfort after fifteen minutes, not after five seconds. Settings vary with room color, distance, and personal sensitivity. Make one change at a time.

How to Reduce Glare Through Screen and Room Setup

How to Reduce RGB Glare?

How to Reduce Glare Through Screen and Room Setup

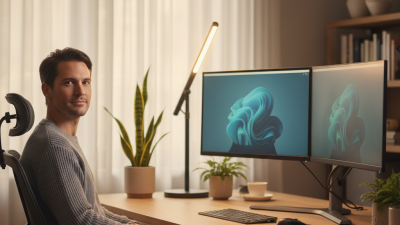
RGB glare often starts with reflection, not the LEDs themselves. A bright screen facing a window can act like a small mirror. Place the display perpendicular to the window, then close curtains during bright hours. Keep the top edge near eye level and sit roughly an arm’s length away. Lower brightness until white backgrounds look calm, not glowing. Do not make the screen extremely dim. That can create new strain. Try this tonight.

Use indirect room light behind or beside the display. A soft lamp aimed at a wall reduces sharp contrast around RGB lighting. Keep colorful light strips away from the screen’s direct reflection path. Reduce saturation and animation speed when the colors feel restless. Slow transitions matter. For photo or video work, use a neutral wall and steady white light. Colored room light can distort your judgment of screen colors.

My old setup was too dark, and I confused low glare with comfort. That was not entirely true. Clean the screen with a suitable microfiber cloth, because dust scatters small highlights. Check the display from your normal sitting position, not from the side. Move one light at a time. This makes improvements easier to notice. If headaches, eye pain, or blurred vision continue, arrange an eye examination.

How to Test and Maintain a Glare-Free RGB Environment

RGB lighting can look impressive, yet excessive brightness creates sharp reflections on screens, desks, and glasses. In practical room tests, I begin at the lowest useful brightness. I check the light from the normal seating position, not beside the fixture. A lux meter gives a better reading than a phone camera. I also photograph the wall with fixed exposure settings. Uneven color patches often reveal hidden hotspots. They are easy to miss during setup.

Test for glare at different times. Daylight can hide problems. After sunset, view screens, glass surfaces, and polished furniture from typical eye level. Move your head slightly. If a bright reflection follows you, change the angle or add diffusion. Avoid aiming light directly toward faces. I inspect cables, diffusers, and vents monthly. Dust can scatter light and increase perceived harshness. Check for visible flicker at lower brightness levels, especially during long work sessions. My process is not perfect; camera exposure can mislead me, and comfort still needs human judgment.

Tips: Start below maximum brightness. Use indirect placement. Keep RGB away from glossy surfaces. Record brightness, color, and viewing distance during each test. Repeat the check after one week. Ask another person to inspect the room, because installers often overlook familiar reflections. Clean diffusers gently. Replace damaged covers promptly. Do not rely on appearance alone.